 The shape tween and the classic tween are great for practical purposes. But, the most versatile tween in Adobe Flash has got to be the motion tween. The motion tween does what the classic tween wishes it could. It allows you move objects easily and manipulate the size or rotation of those objects. Best of all, the motion tween is really easy to use. One note however, you must make the object that you’re wishing to motion tween into a symbol. But that’s no biggie. Here’s a video tutorial on how to create a motion tween in Adobe Flash. The step by step tutorial follows.
iPad users watch the movie here> How to Create a Motion Tween in Adobe Flash
How to Create a Motion Tween in Adobe Flash- Step by Step
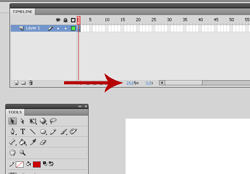
Begin by opening up a new Flash file in action script 3.0. Go to your timeline and change the fps (frames per second) to at least “24”.
Next, go to frame 1 in your timeline and select the first frame. Draw the shape that you would like use the motion tween on on the stage (or off). In this tutorial, I’ll draw a red circle.
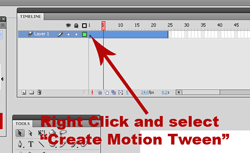
Now, just right click on frame 1 in the timeline. (You can also right click on the object that you’d like to tween.) Select “Create Motion Tween” from the drop down menu. It will give you a message that explains that the object needs to turned into a symbol in order for it to be tweened. Click “Okay”.
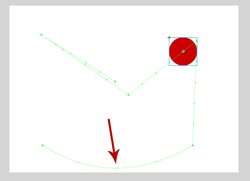
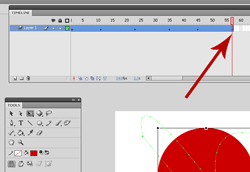
Your time line will now extend out to give you a second worth of animation. If you set your frame rate to “24”, then you will have 24 frames. You will also notice that the timeline turned blue in those frames. Select the frame where you want the object to be moved to. In other words, if you wanted the object to move across the stage at frame “5”, then go to frame “5”. Use the black selection arrow to grab the object and move it to where you want it to move to. You’ll notice a green line with some dots will appear along the path of the motion tween.
Keep repeating this around the stage. Each time, a new black dot will appear in your time line and a new set of green lines with dots will also appear.
Now you’ve got that object moved to the different places that you want it to move to. Let’s say that you wanted to make the object move on a curved path instead of a path that makes sharp turns. Use the black arrow selection tool and select the points along the green line. You can pull these lines out to make a curved path.
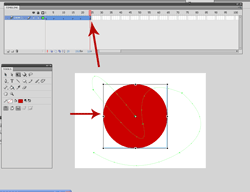
Let’s say that you wanted to make the shape get larger or smaller with the motion tween. Select the object, then go to “modify” at the top of your screen. Select “scale”, and grab the right corner of the object and pull it out so that it is larger or smaller.
You can now quick export your movie by clicking “ctrl” +”enter” on your keyboard. If the animation is too fast, you can extend out the timeline by going to the end of the motion tween and pulling it out. If the animation is too slow, you can make the motion tween shorter as well.
Now you can export your movie or apply your motion tween to a new project. Here’s what my example for this tutorial looks like…
